Thursday, January 29, 2015

Project Life 2015: Week 3 and a Freebie!

For week three, I kept it pretty simple.  I had a ton of photos that I wanted to include, so I love the 4x6 photo collages from The Lilypad.  (Find them here)

 I recently discovered all of the AMAZING goodies over at Digital Designs Essentails, and used cards from the About a Boy journaling card set.  Not only do they have really nice, modern designs, they also have AMAZING customer service.  I got a reply to my email back in no time (and it was after 11pm on a Wednesday night).
While this week's layout doesn't flow the way I like (using two of the "Design A" style layouts), I love that I was able to get all my pictures on this page.  

If you fancy a photo collage, then here's a freebie just for you!

Click here to download the free Photoshop (.psd) file I created for my second page.  (For personal use only).

Friday, January 23, 2015

How to Create Poster Collage + Free Template!


I have the best parents in the world.  Really.  I do.  They love my son and my niece and nephew more than life itself, so I had no objection to my mom wanting to plaster pictures of them onto her walls at work.  She works at a school, you see, and the walls inside her office are made of cinderblock.  They are painted the same boring off-white that most public schools in America are covered in.  Since her walls were pretty big and pretty bare, we decided to make her quite a large poster to help spruce the place up a bit.

She can't use nails to hang up regular frames, so we made it cinderblock friendly.  Here's how.


1. DOWNLOAD MY FREE TEMPLATE: 
I created this template in Photoshop Elements, and filled that bad boy up with tons of pictures of our sweet babies.  I wanted it to be rather large, so the template is sized at 20x30 inches.  (You can always resize if you want to make it smaller.)


2. ADD PHOTOS TO TEMPLATE USING PHOTOSHOP:
 Easy peasy.  Took me about 5 minutes once I chose all my pictures.  Narrowing them down was definitely the hardest part of this whole project.  There are great tutorials online for adding and clipping photos into a template if you need to brush up on your skills.  (Use the magic of Google)


3. PRINT POSTER:
I luuuurve me some Costco, and they did an awesome job printing this at poster size for about $8.  


4.  MOUNT OR FRAME POSTER
Whadya know...$2 Elmer's foam core board from Wal-mart is almost exactly the same size as our 20x30 print!  Since we can't use anything that would require nails to hang, we opted to go this route.  You could just slap the poster on the wall with a little adhesive, or go the fancier route and put it in a poster frame.  


For the foam core option, I used just a regular craft tape runner to stick it to the board.  I made sure to put quite a bit around all the edges so they stay nice and crisp.  The foam core was a teensy bit larger than the poster, so I used an exacto knife and ruler to cut off the excess.  Since the edges of the template are white, you could totally skip this step and no one would really be the wiser.  


The finished product ended up better than I was hoping for!  Costco really does an amazing job printing this size, and the template's boxes are just the right size so nothing gets distorted when making the enlargements.  Quite a few of these were cell phone photos, and they didn't look bad at all.  

We used double sided foam tape for posters to hang it on the ciderblocks, and all those sweet babies sure do make her office a lot cuter! 

OTHER WAYS TO USE:
-These would be adorable to make for parties/showers, and hang up temporarily as a fun decoration.
         -show how much a baby/child has grown in the last year
         -display engagement, maternity, or nursery photos at a shower
-Resize the whole template and use it in your scrapbook.  Use the text tool in PS and add some journaling.
-Scan/take photos of your child's artwork and combine it all into one print to display.

Thursday, January 15, 2015

PL TimeWarp & What To Do With Your Paper Stash Once You Go Digital

Luccccccy, you gotta 'lotta catching up to do!

I have, ooooh, about 25 weeks that I didn't finish from my photo album last year.  I really, really wanna get that bad boy finished and printed, so I'm planning on kind of working backwards and completing the most recent PL weeks first (since the details are the freshest in my mind. Aaaaand because I LOVE getting to relive the holidays.)  So, let's begin around November, shall we?


Since I've been neglecting the giant hoard of scrapbook paper that I have in my office after switching to digital, I experimented with scanning to see if I could use it digitally.  I cut a piece of Doodlebug Designs Happy Harvest paper down to about 8x8, and scanned it on the fine picture setting on my Canon scanner.  When used at full size, the scanned result looked a little grainy (not anything like digital paper you can buy), but when shrunken down for a 3x4 card, I think it looks pretty dang good!

 I made the title card just by using the scanned paper and the circle tool in Elements.  I pulled the blue out of one of the leaves in the paper to fill the circle.  The font is Ostrich Sans.  Flatten that baby, add the text, flatten again, and you've got a custom title card.

I also made the card on the bottom right (The one that says "Dada? Da-dee?")  I scanned coordinating patterned paper, and used it to add a washi like strip to the bottom.  Just a little pop of color with the rectangle tool.


The plaid paper was also a scan from that same Happy Harvest line.  The old me would have had that colorful crap all over the whole page.  The new me is using it in moderation to add a little bit of color and pattern here and there.  I think the way to make your scrapbook look modern and fresh is finding a happy medium with your photos and the amount of embellishments.

**TIPS**

- If you're having trouble figuring out where to put colorful elements in your layouts, thing about the triangle rule of design.  Placing eye catching elements in a triangle shape will be more visually dynamic, and help the eye move across your pages.  It also helps kind of balance things out.

-The bottom photo includes a photo of the members of a book club I am in, and I create my scrapbooks with the intention of them being treasured possessions for YEARS to come.  I like to label the photo like this with each person's name, (which I blurred out for privacy) so I can remember everyone 10, 20, 30 years down the line.

Here's to you, 2015!

I'm starting off the new year with a new approach to my Project Life memory keeping.  Keep it simple.  Keep it modern.  Keep it MANAGEABLE.  

For the first half-week of the year, I included a few images that came from a free MAMBI printable.  I just downloaded the file, opened it in Photoshop Elements, and cropped the cards that I wanted.  (Get yours here:  http://www.meandmybigideas.com/blog/2014/12/24/freebie)

I also wanted to use a lot of white space and gray text to keep the focus on my photos.  Even though they're just from my iphone, I feel like they're still the heart of the reason I even bother scrapbooking at all.  Pictures are my world, ya'll.  If my house was burning, my external hard drive would be the only material thing I would care about grabbing.  

Since I really only had three days worth of photos/stories to fill both pages, I loved utilizing a different layout, and also being able to incorporate some goals for the year in there (as well as a few other tidbits.) 

Since I'm a little behind finishing last year's book, I have set a goal to finish three weeks worth of PL each week this year.  I will keep up to date and complete a layout for the previous week, as well as two weeks from 2014.  Hopefully I should catch up soon, and I can print out my entire album from Shutterfly.  The suspense of seeing the finished product has got to be the only major downside of going digital.  Other than that, I love this moden, no mess, no muss approach.  

Here's to you, 2015!  


Sunday, August 17, 2014

Etsy Shop is Now Open!

So excited to announce that my etsy shop is now open!  It'll mainly feature paper goods and painted products.  Here's a sample of some things in there, with lots more in the works!!

www.etsy.com/shop/bigskylullaby


Thursday, April 3, 2014

Make a Sensory Learning Box with Stuff You Already Have

If you're like me, you probably have an abundance of craft items that currently make a corner or closet of your home look like an episode of Hoarders.  Well, now is the time to put all that stuff to good use!  My little guy is into EVERYTHING, and he loves to explore different textures.  Thus, the tactile sensory box was born, using items from around our house and my craft stash.   Fire up your hot glue guns girls!  

 To start, you'll need a box to adhere all your items to.  I used this nicer box from an empty Project Life kit that has a magnetic closure.  You could easily use a gift box, shoe box or even a piece of cardboard/foam core.  Just make sure it's sturdy enough to withstand repeated abuse from little hands.

When looking for items, make sure you keep baby's safety in mind.  Even though all of the items I included are rather large, this would something I would only give my little guy while I supervised. I hot glued the beejebus out of ALL of these things, but you never know what little fingers are capable of.   :)

I laid them all out on the top and bottom before I glued anything down so that I could adjust the sizes and spacing.

Here are the items I included:


For items that are clear or blend into the white background, I just added a little doodling to draw baby's eye.
 The woven pleather material is a piece of a makeup bag that came with a free gift from a cosmetics counter.  And the fur, well, comes from my outdoorsman of a husband.  Oddly enough, it's Jack's favorite thing to touch in the box.  Faux fur would totally suffice.
My little guy LOVES this, and keeps him busy for quite some time.  The beauty of this project is that you can customize it to include what you have around your house, and it's FREE!  Here are some other items you could include:

small slice of wood
rocks
pipe cleaners
cotton balls/pom poms
burlap
piece of wash cloth
sandpaper
raffia
velcro
yarn
glitter paper
felt
waxed paper
faux fur
popsicle sticks
sequined/beaded fabric
puff paint dots


Wednesday, February 26, 2014

Think Pink

Warm spring weather is just around the corner, and I may be guilty of already dressing like it's here. I'm LOVING all things pink, and I admittedly wear it all year round.  Bright, obnoxious pink.  And if that's wrong, I don't wanna be right.

But there is a way to incorporate it into your wardrobe without looking like Barbie's Little Shop of Horrors.  Here's some of my favorite ways to include one of my most loved hues in a good way.

Orly's Beach Cruiser

Best described as a "fluorescent pink cream," this polish is like a highlighter, in the best way possible.  If it's a little too loud for your taste, the other pink I always reach for is Essie's Bachelorette Bash

Still pink and lovely, just a little more toned down.  


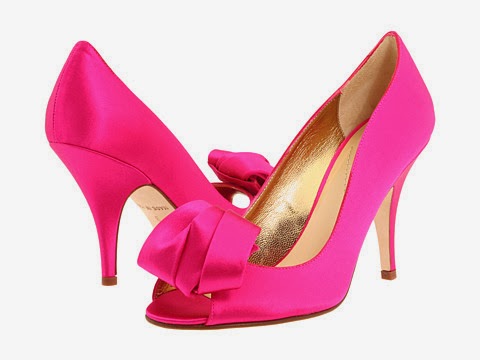
Uh.mah.gah.  uh.  mah.  gah.  These might be the most perfect shoes the world has ever known.  Ever.
Such a fun pop of color with a little black dress or a wedding gown.  Hell, wear them while you're vacuuming.  LOVE! (Am I the only one that likes to wear new shoes around the house when I first get them?)

A more practical option: RSVP Jutte
At $79, these are a little more in my price range than the Kate Spade beautes, and these are still beautiful.


Kendra Scott Harlow Necklace and Morgan Earrings


It's no secret that I'm a HUGE Kendra Scott fan, and she just released some of my favorite pieces in both magenta and neon pink.  I own these pieces in magenta, and the color is GORGEOUS!  You really can pair this color with so many others for a classy pop of color.  I love it with navy, purple, turquoise, and even a warm pumpkin orange.  Perfection, Ms. Scott. Perfection.

NYX Lip Pencil in Fuchsia
This is a beautiful fuchsia shade that I think would look great on a variety of skin tones.  I believe mine was under $5 at Ulta, makes my teeth look crazy white and stays on pretty well.  What's better than that?  I use it to fill in my entire lip, and use a clear gloss on top when I want the true color, a muted nude shade on top when I don't want it as vibrant, and I use Revlon Color Burst Lip Gloss in Adorned


when I want some seriously pink lips.  The gloss is beautiful on it's own also.  These have been some of my favorite lip products of the last few months.  You wouldn't think bright pink could be as versatile as it really can be.

Featherweight Cardigan 

Am I the only one that longingly looks through the JCrew catalog imagining what my closet would look like if I won the lottery and didn't have to worry about spit up and chewed puffs all over my clothes?  Anyone?  No?

Well, a hot pink cardigan is always a beautiful addition to a wardrobe, and can be worn to work or utilized on a casual day.  If my wallet was bottomless and my clothes stayed pristine, I'd pair this bad boy with a pattered cotton shirt.  (Polka dots would be at the top of my list).

Tarte Amazonian Clay Blush in Amused

If you aren't familiar with the amazingness that is Tarte's Amazonian clay blushes, get one or two of these in your life.  You deserve it.  Blush will last you forever, and these colors/formulas are beautiful. Easy to apply, awesome color payoff, and they stay put for hours.  This color in particular gives you that "just in out of the snow" look like Jack Frost has been doing some nippin' (wait...that sounded like something altogether different than what I meant...)  You get the idea.  Natural, youthful color.  There. No more nippin' references.  

Even if you're not the biggest fan of pink, try it.  Just try.  It's a great color for your complexion, and it's fun and girly.  What are your favorite pink items?